

Email Configuration
Please choose your email client:
Mozilla Thunderbird
Windows 10 Mail
Apple iPhone, iPod
Android Phone (Samsung native Email app)
Android Phone (using Gmail app)
Android Phone (Gmail app) - IMAP Setup

These instructions are for the Gmail app on Android devices. Google intends to replace its native email app with the Gmail app, which seems to work well for non-Gmail IMAP accounts.
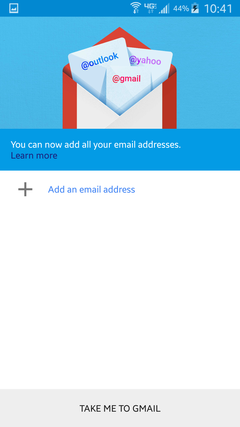 1. Select Add an email address.
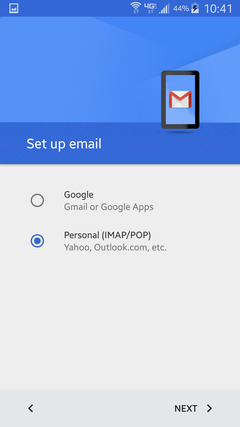 2. Choose Personal (IMAP/POP).
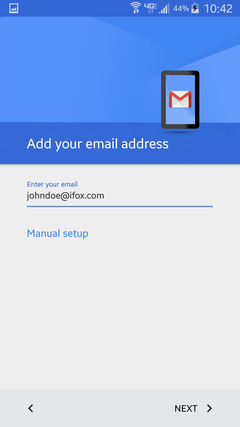 3. Enter your email address.
If you use IMAP on a mobile device, your computer and other devices should all use IMAP also.
 4. Choose Personal (IMAP) as your account type.
If you use IMAP on a mobile device, your computer and other devices should all use IMAP also.
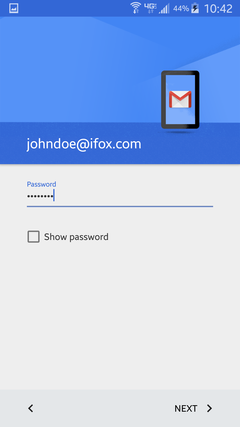 5. Enter your email password.
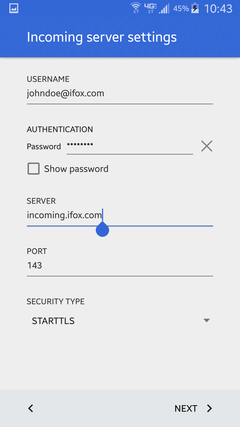 6. Ensure your full email address is listed under Username. Change Server to
incoming.ifox.com. Make sure Port is
set to 143 and Security Type is set to STARTTLS.
6. Ensure your full email address is listed under Username. Change Server to
incoming.ifox.com. Make sure Port is
set to 143 and Security Type is set to STARTTLS.
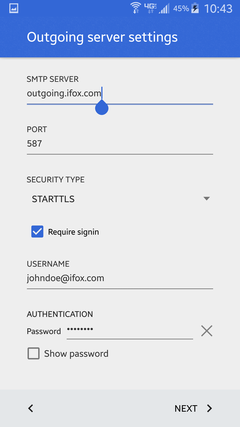 7. Set SMTP Server to outgoing.ifox.com.
Make sure Port is set to 587 and Security Type is set to STARTTLS.
Authentication information should already be enabled and set below.
7. Set SMTP Server to outgoing.ifox.com.
Make sure Port is set to 587 and Security Type is set to STARTTLS.
Authentication information should already be enabled and set below.
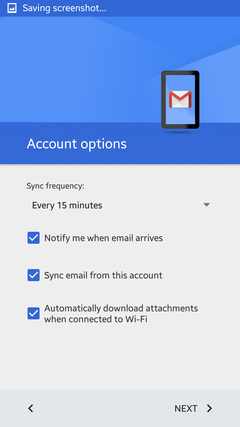 8. Set account options as desired. The defaults are usually acceptable.
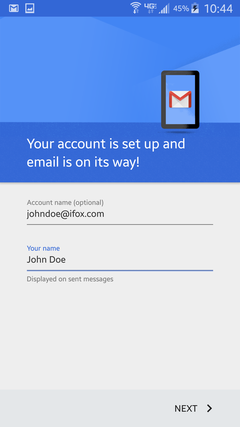 9. You can now name your account. By default your email address is used, which is usually the best.
For Your Name, type in your name as you would like it to appear on outgoing messages.
9. You can now name your account. By default your email address is used, which is usually the best.
For Your Name, type in your name as you would like it to appear on outgoing messages.
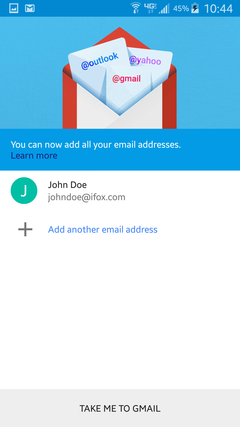 10. You are returned to the email accounts screen. Press Take Me to Gmail to complete setup.
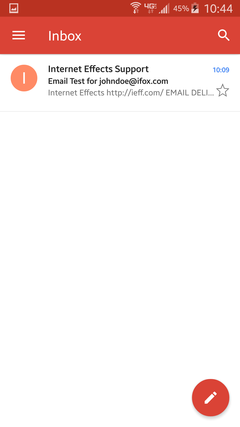 If you see your email inbox, your setup is complete.
Please choose your email client:
Mozilla Thunderbird
Windows 10 Mail
Apple iPhone, iPod
Android Phone (Samsung native Email app)
Android Phone (using Gmail app)
Android Phone (Gmail app) - IMAP Setup
These instructions are for the Gmail app on Android devices. Google intends to replace its native email app with the Gmail app, which seems to work well for non-Gmail IMAP accounts.
1. Select Add an email address.
2. Choose Personal (IMAP/POP).
3. Enter your email address.If you use IMAP on a mobile device, your computer and other devices should all use IMAP also.
4. Choose Personal (IMAP) as your account type.If you use IMAP on a mobile device, your computer and other devices should all use IMAP also.
5. Enter your email password.
6. Ensure your full email address is listed under Username. Change Server to
incoming.ifox.com. Make sure Port is
set to 143 and Security Type is set to STARTTLS.
7. Set SMTP Server to outgoing.ifox.com.
Make sure Port is set to 587 and Security Type is set to STARTTLS.
Authentication information should already be enabled and set below.
8. Set account options as desired. The defaults are usually acceptable.
9. You can now name your account. By default your email address is used, which is usually the best.
For Your Name, type in your name as you would like it to appear on outgoing messages.
10. You are returned to the email accounts screen. Press Take Me to Gmail to complete setup.
If you see your email inbox, your setup is complete.